![Connect Game - Click the [Connect to World] button.](/assets/worldline-guide/connect-world-0.gif)
Step 01
Click the [Connect to World] button.
1. Connect your game to the program to manage save files.
Step 1. Connect Game
Connect your game to the program to manage save files.
1. Connect your game to the program to manage save files.
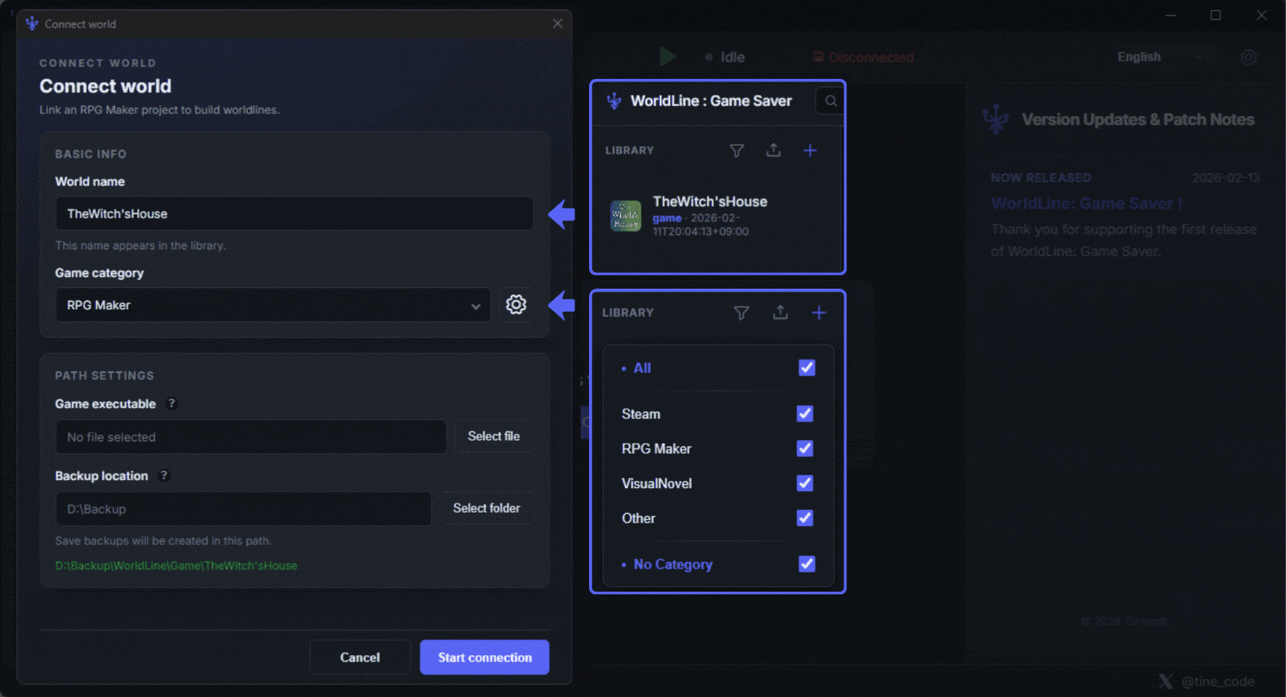
1. Set 世界名 to the library name for managing the game.
2. Set the game category so you can quickly find the library later with the filter feature.
3. Link the game executable in ゲーム実行ファイル. The running game is recognized based on this path.
4. Set バックアップ場所 to the save path for tracked files while playing. The program stores save files separately from the game's actual save files.
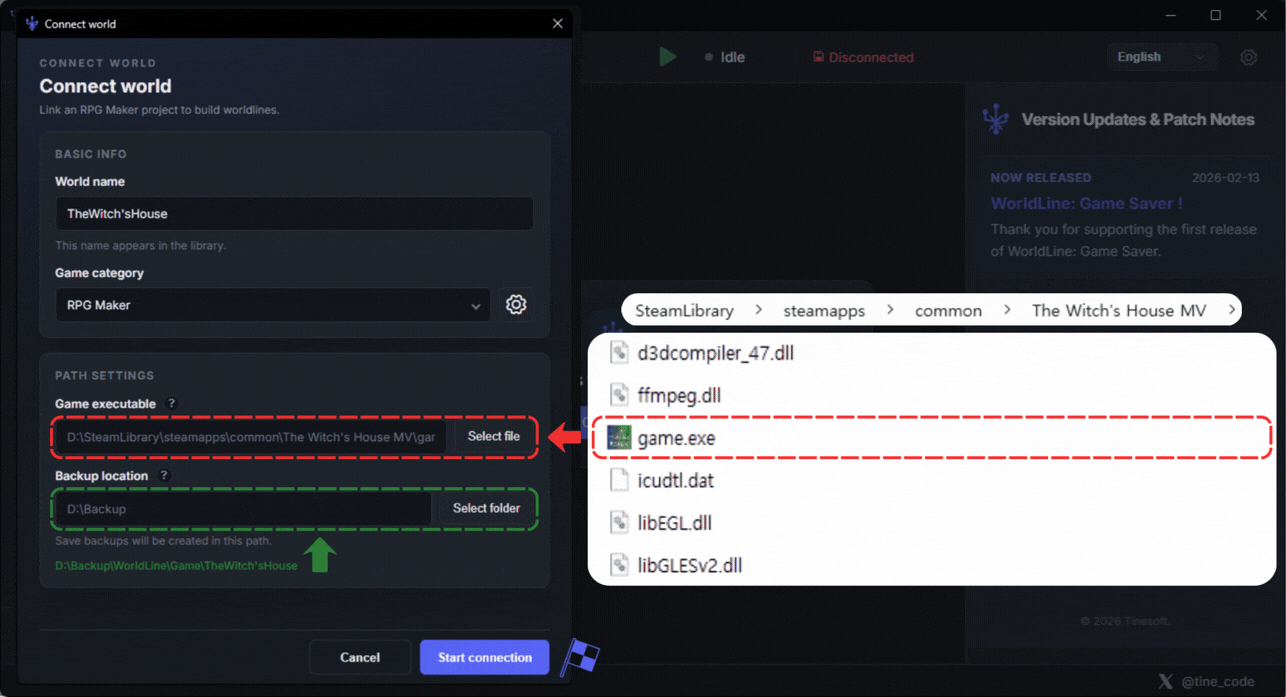
1. Set the game executable path
2. Set the path where WordLine stores game save files
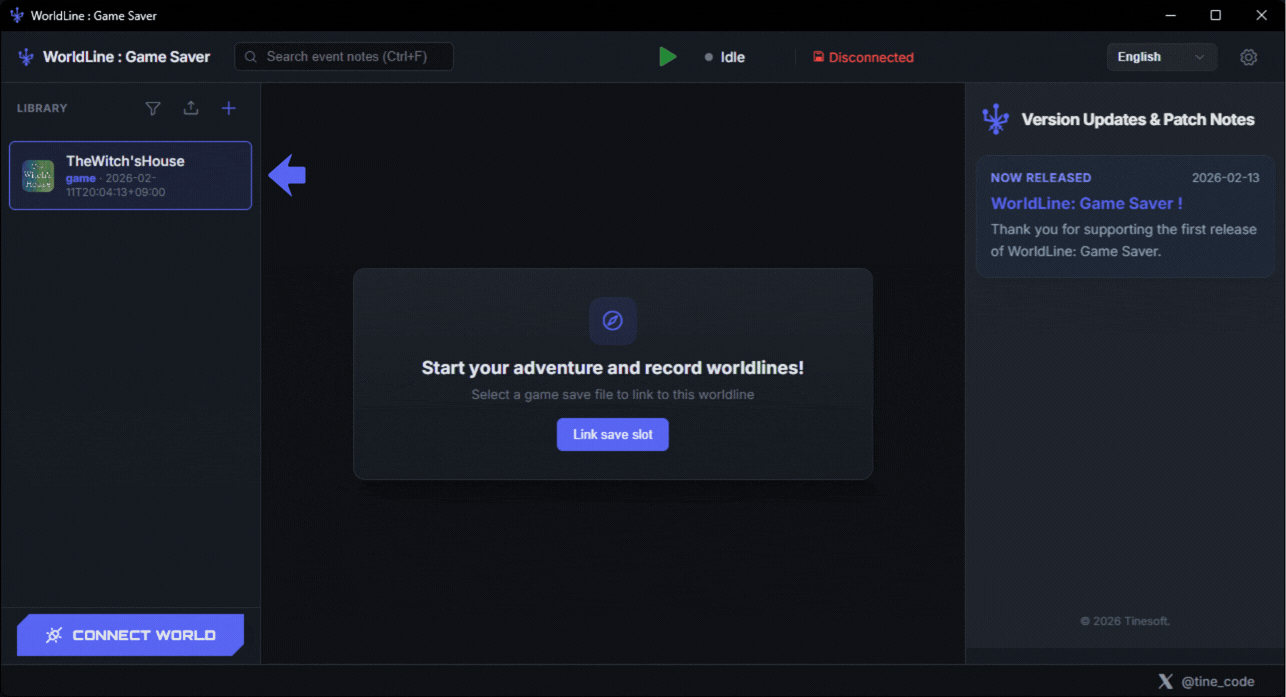
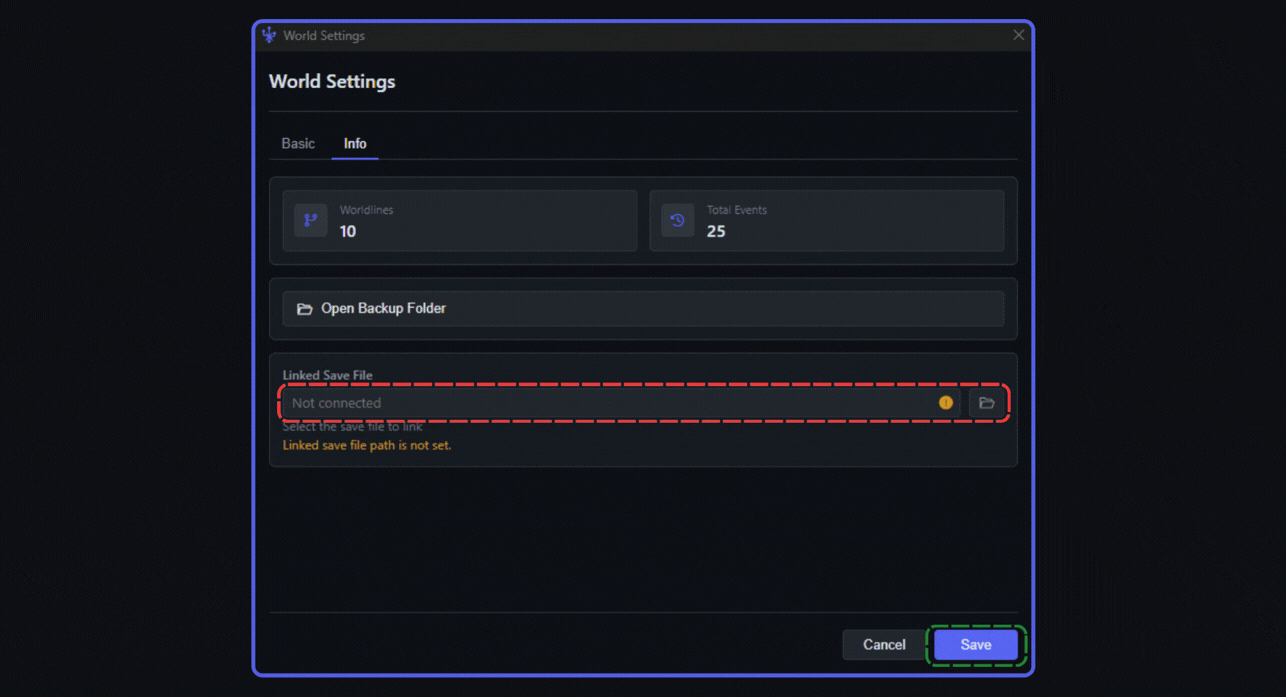
Refer to Step 2 and connect a save slot.
Step 2. Connect Save Slot
Bind a save slot to the selected worldline.
1. Prepare the actual game save file. If you do not have a save file yet, play the game first and create one.
If the game provides multiple save slots, connect the save file of the slot you want to use.
WordLine runs only when saving to the connected slot. Other slots can be used as temporary save slots.
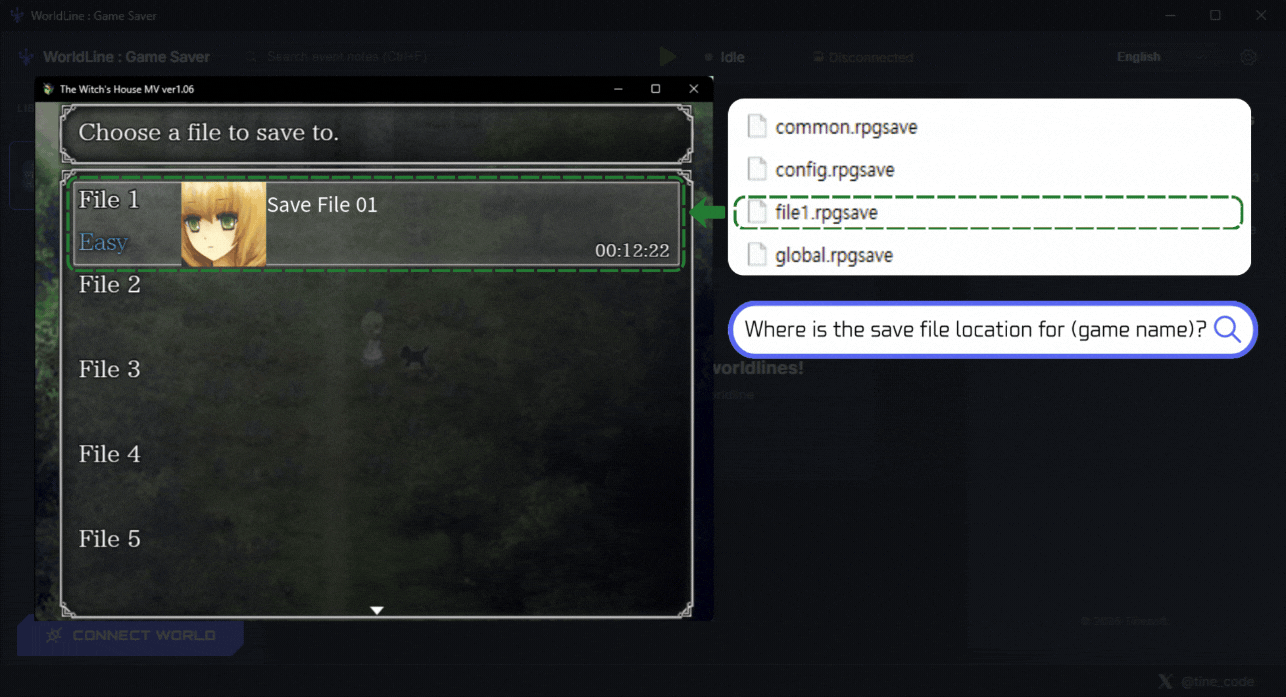
2. If you cannot find the game's save file, search the internet for that game's save file location.
You can find it quickly.
1. Click the library where you want to apply the save file. You will see the Connect Save Slot button. Click it!
2. In File Explorer, connect the actual game save file you prepared in advance.
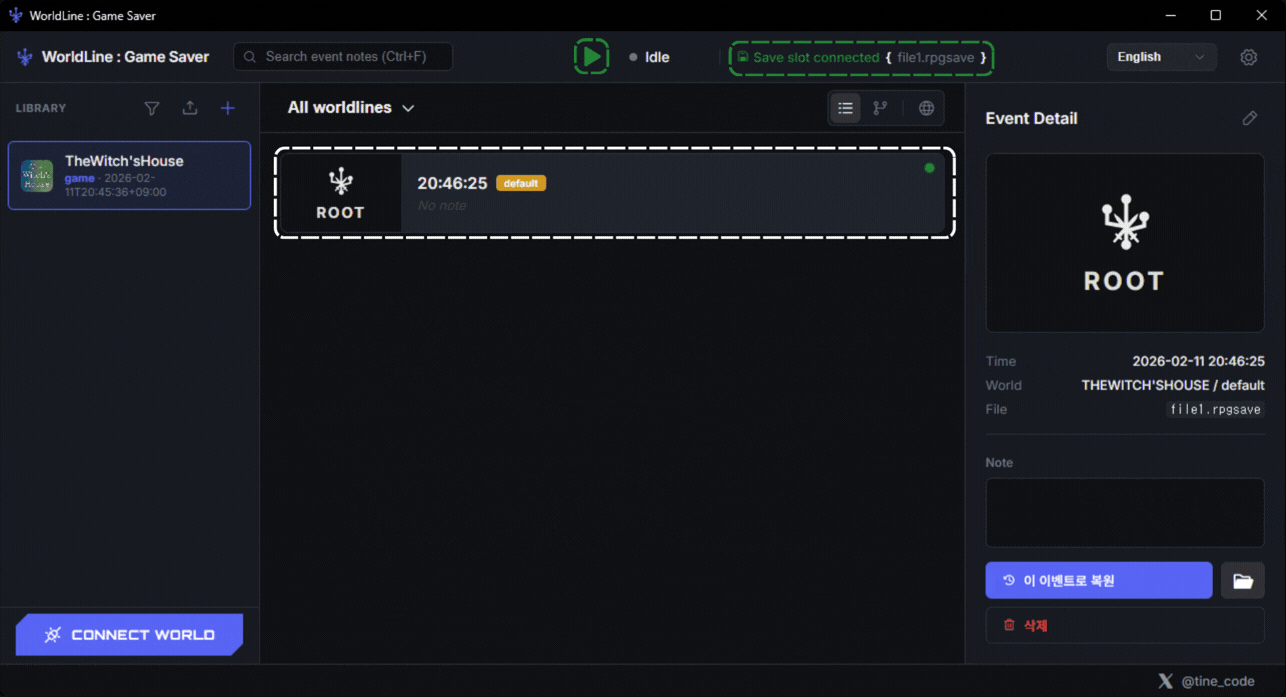
1. Congratulations! The save slot is connected successfully and the ROOT timeline is created.
2. Press the play button to track save files. Continue to Step 3.
Step 3. Launch Game
Run the game after setup and keep tracking active.
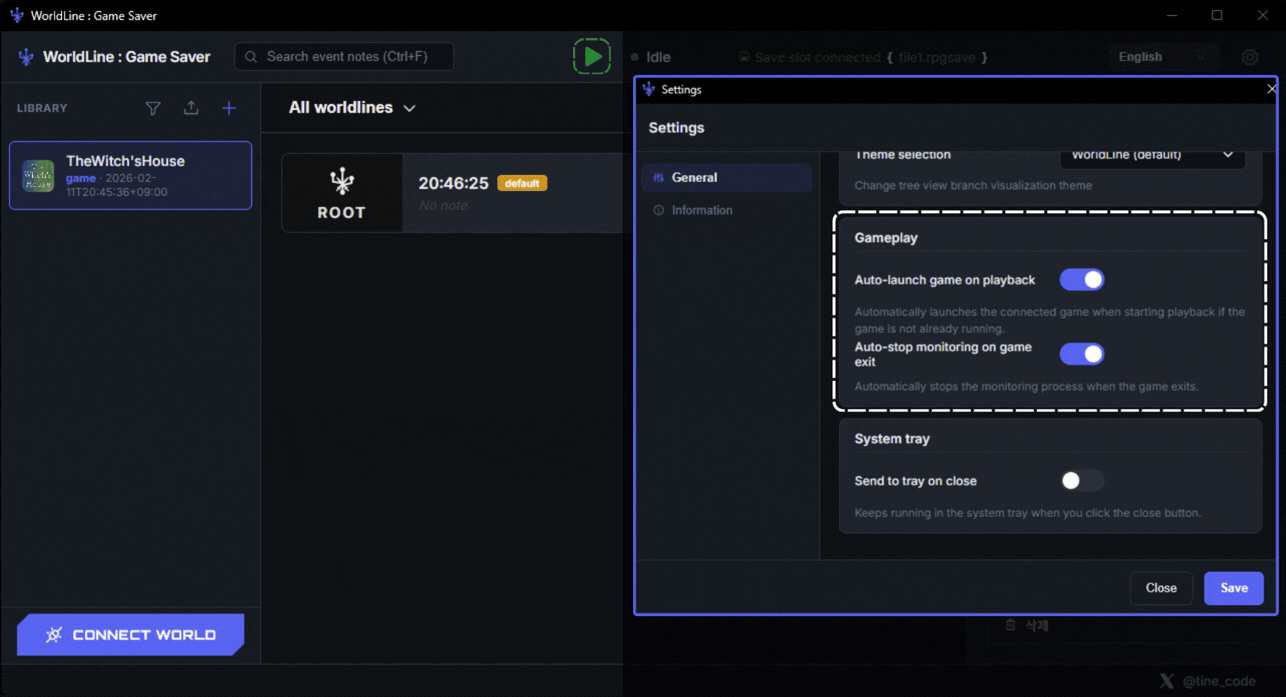
1. You can manage game launch features in the Game Launch section of the Settings page.
2. Even if 再生時にゲームを自動起動 is not enabled, pressing Play lets WordLine track save files normally!

1. Press the Play button to launch the game. Check Step 4 to learn how to save files!
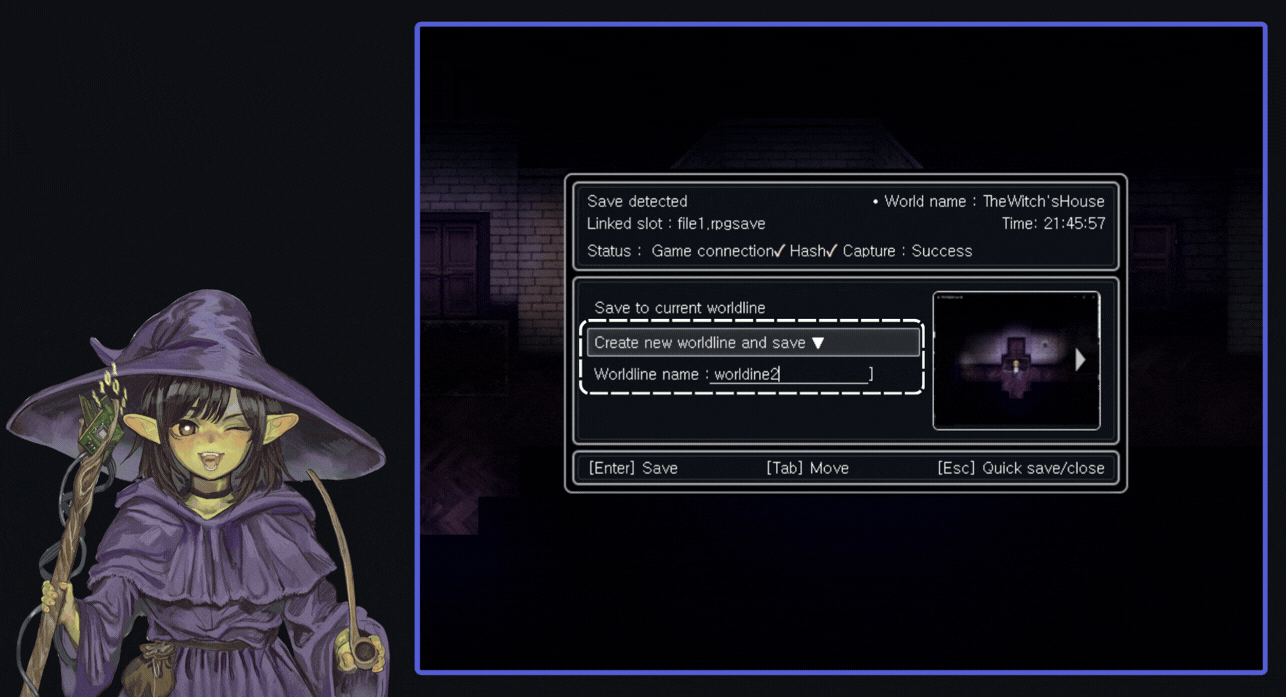
Step 4. セーブデータを保存する
ゲーム内で保存し、イベントがタイムラインに記録されるか確認します。
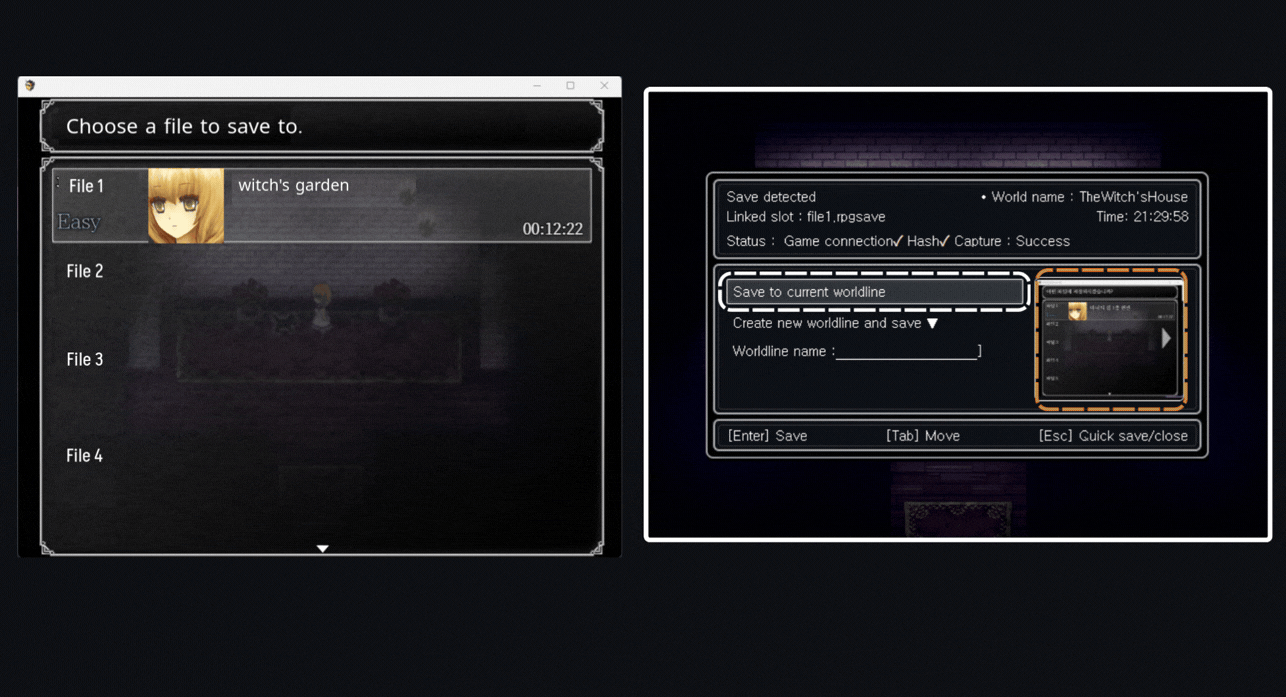
1. ゲーム内でセーブすると、WordLine が自動で検知してセーブウィンドウを開きます。
複数のセーブスロットがあるゲームでは、WordLine に登録したセーブファイルと一致するスロットに保存してください。
2. 既存の世界線に保存することも、新しい分岐を作ることもできます。
3. 撮影されたスナップショットが気に入らない場合は、▷ で変更できます。

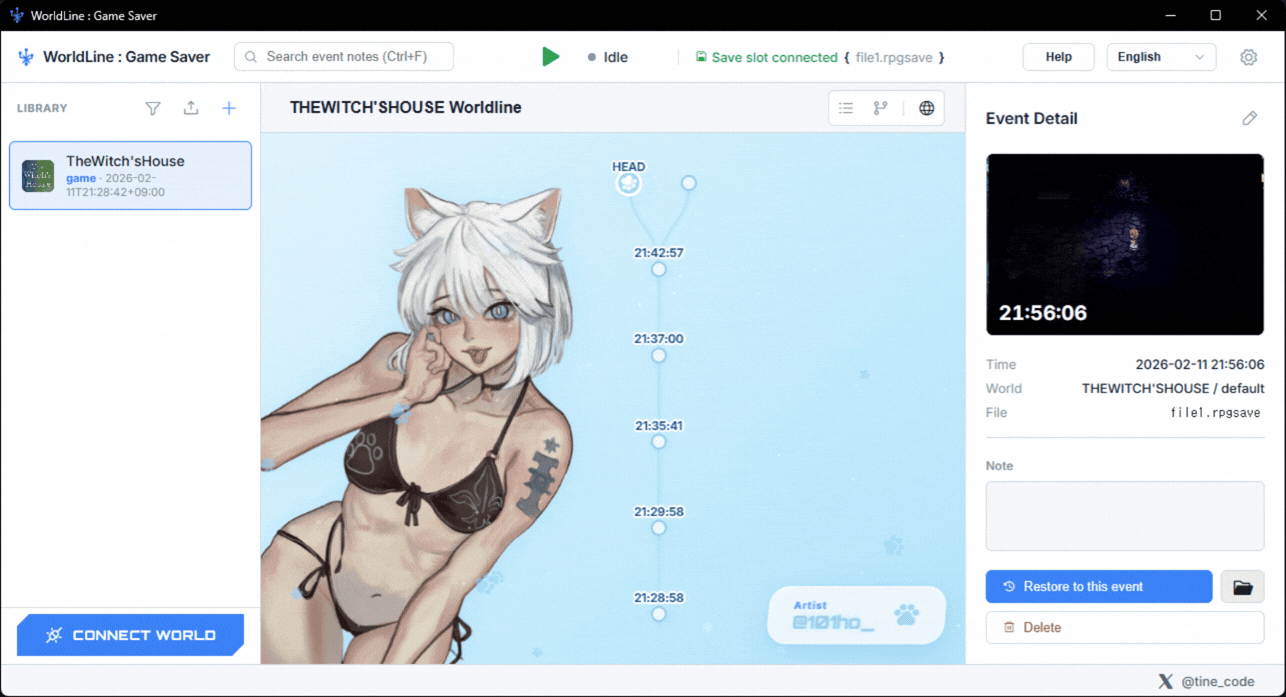
1. default 世界線にタイムラインが登録されました!
2. さまざまな方法でタイムラインを確認できます!
1. 新しい世界線を作成して保存 をクリックすると、新しい世界線の名前を指定できます。
2. 保存すると、既存の世界線から分岐した新しい世界線にタイムラインが保存されます。
この方法で、複数の選択肢を分岐として分けながらゲームのセーブを管理できます!
worldline2 という名前の新しい世界線が作成されました。
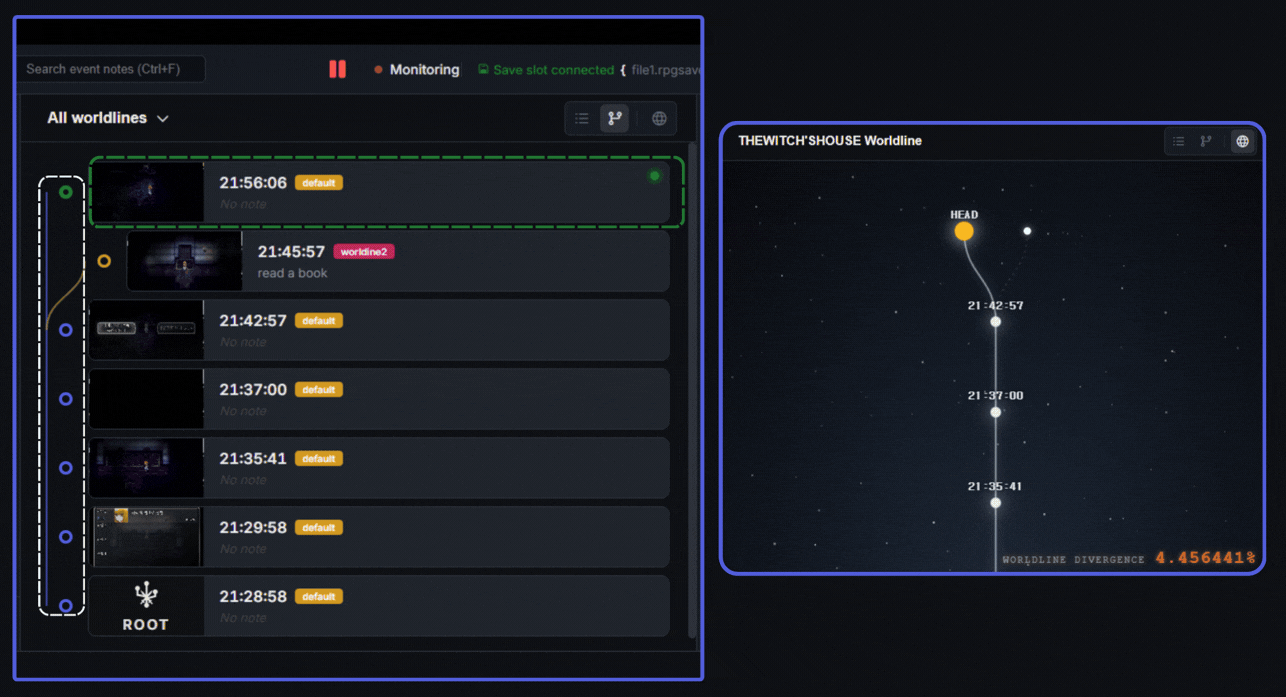
複数のビューから世界線を視覚的に確認して管理できます!
Step 5. Load Branch Point
Load a recorded branch point to continue from past state.
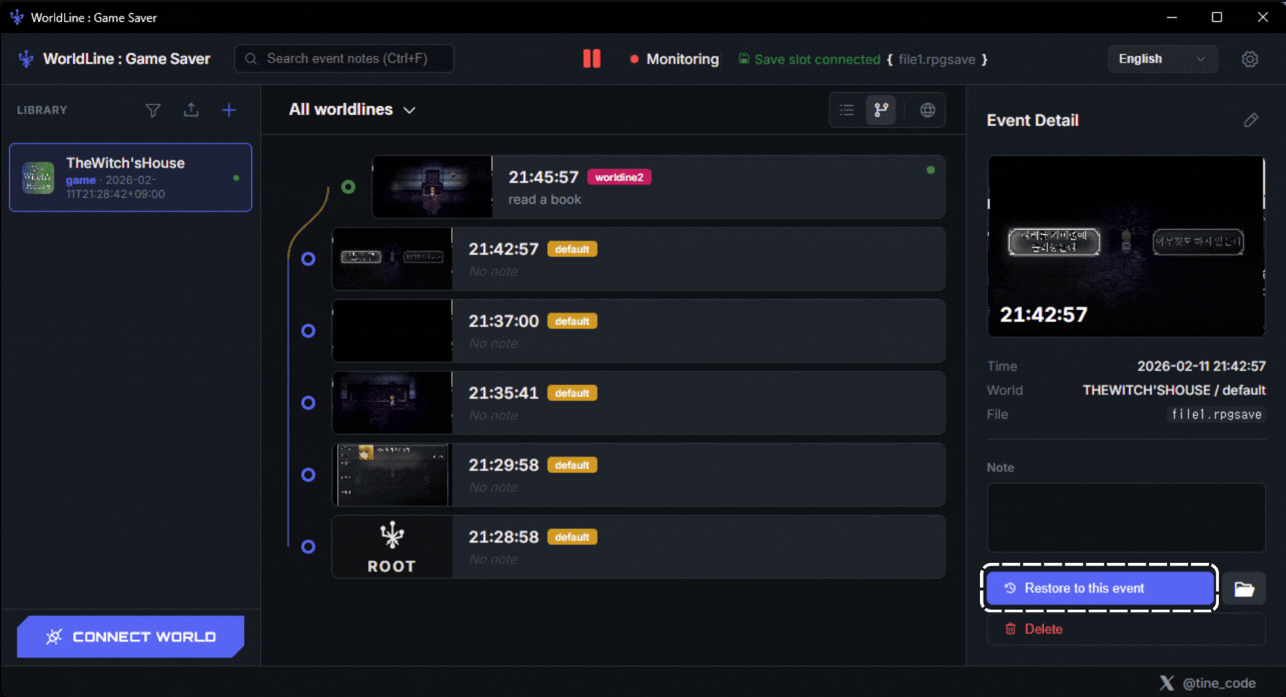
1. Select the timeline you want to play and click the このイベントに復元 button.
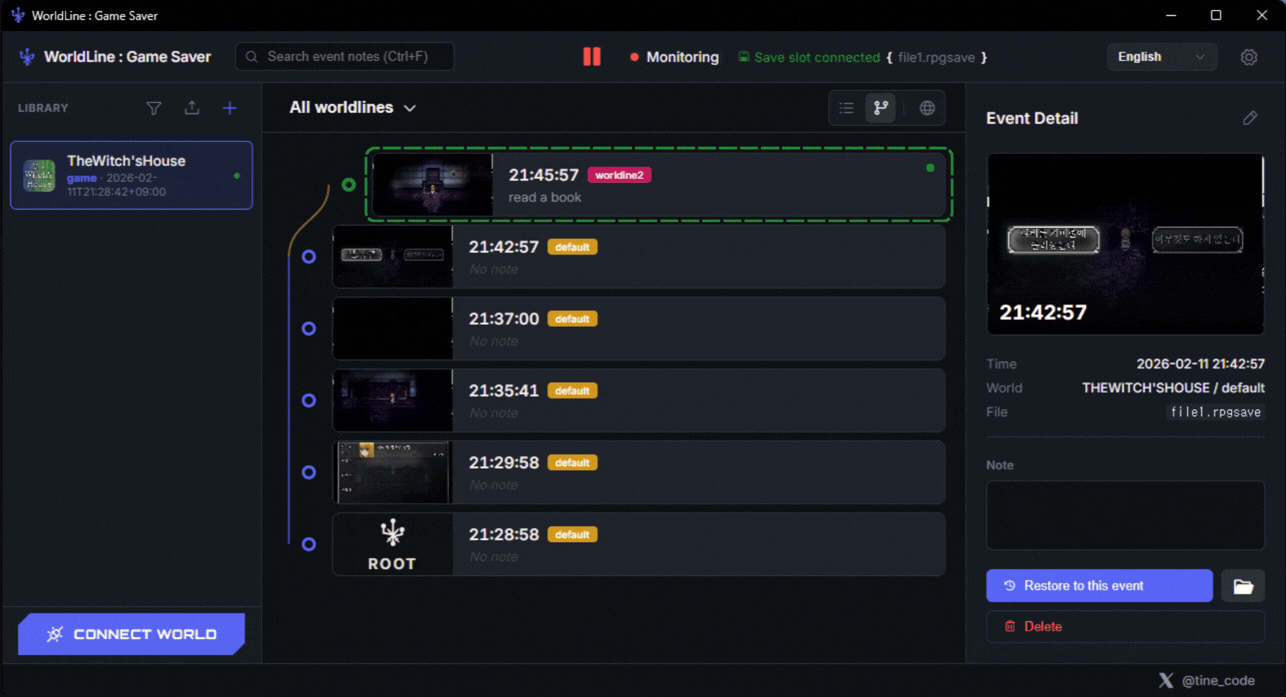
I selected the last timeline in default.
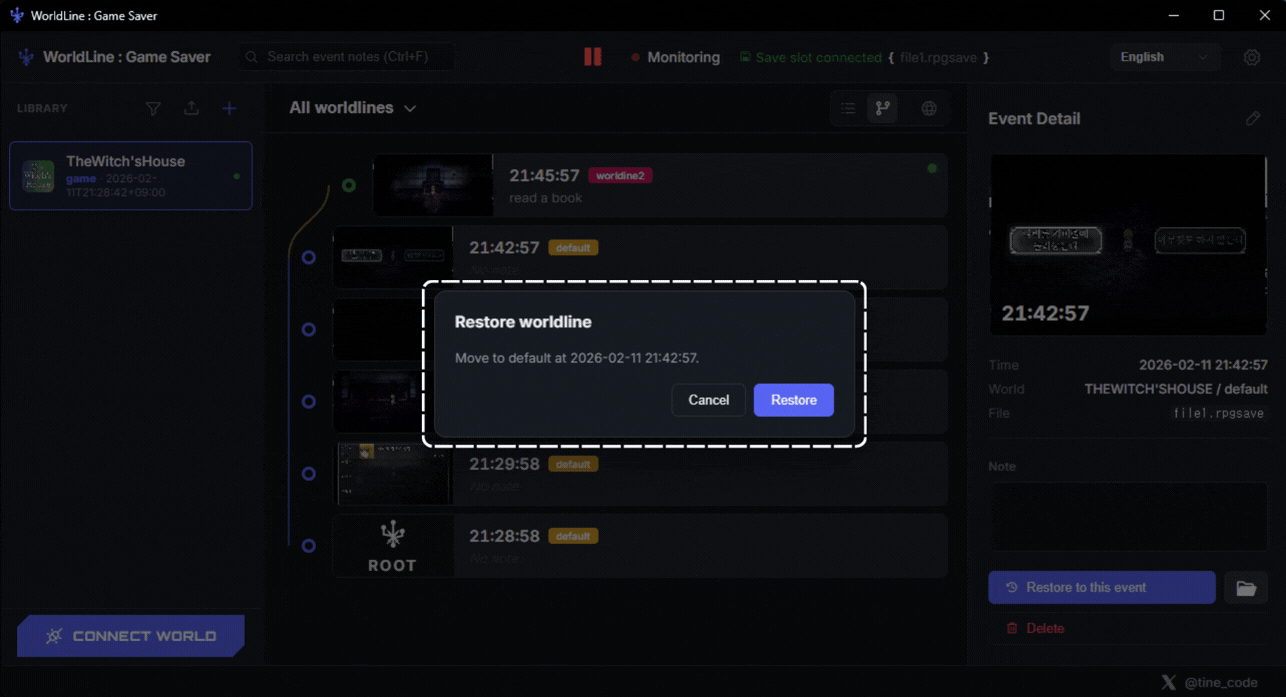
1. Check and decide the timeline you want to switch to at last!
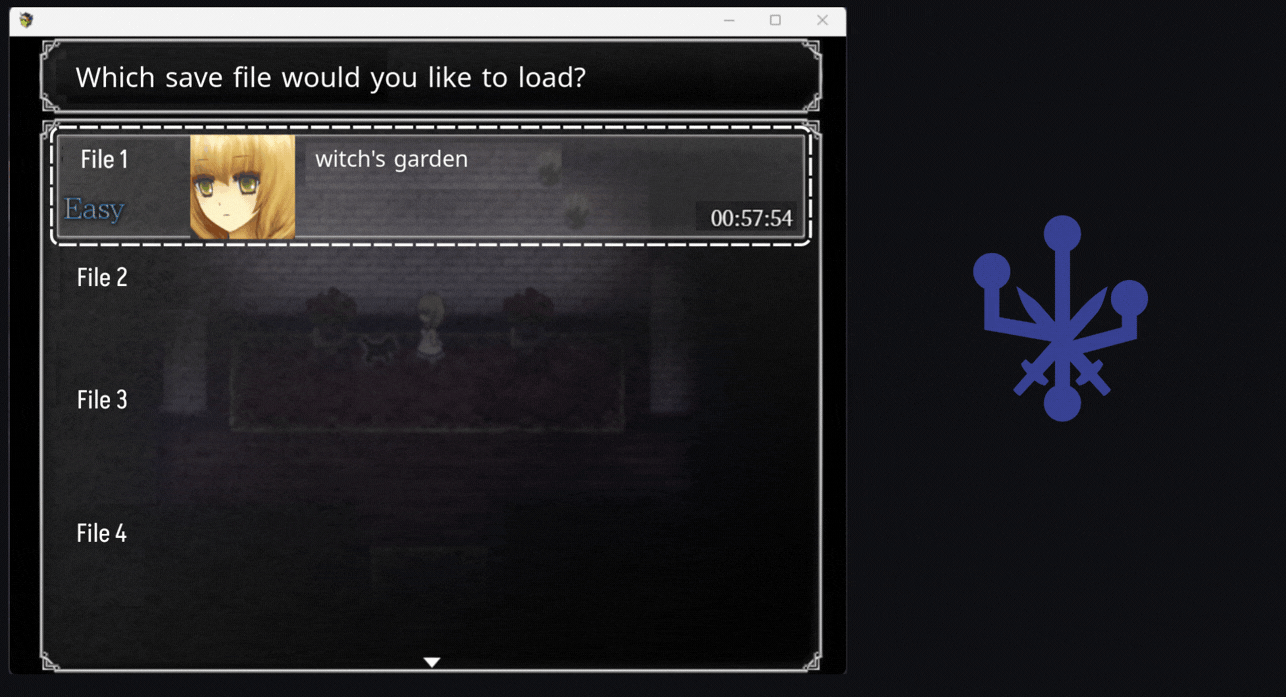
1. In the running game, load the save file again.
1. Switched to the default branch line successfully. Now record a new game timeline with new choices!
2. Check branch points intuitively!
Change User Language
Choose a language in settings and apply it to all UI.
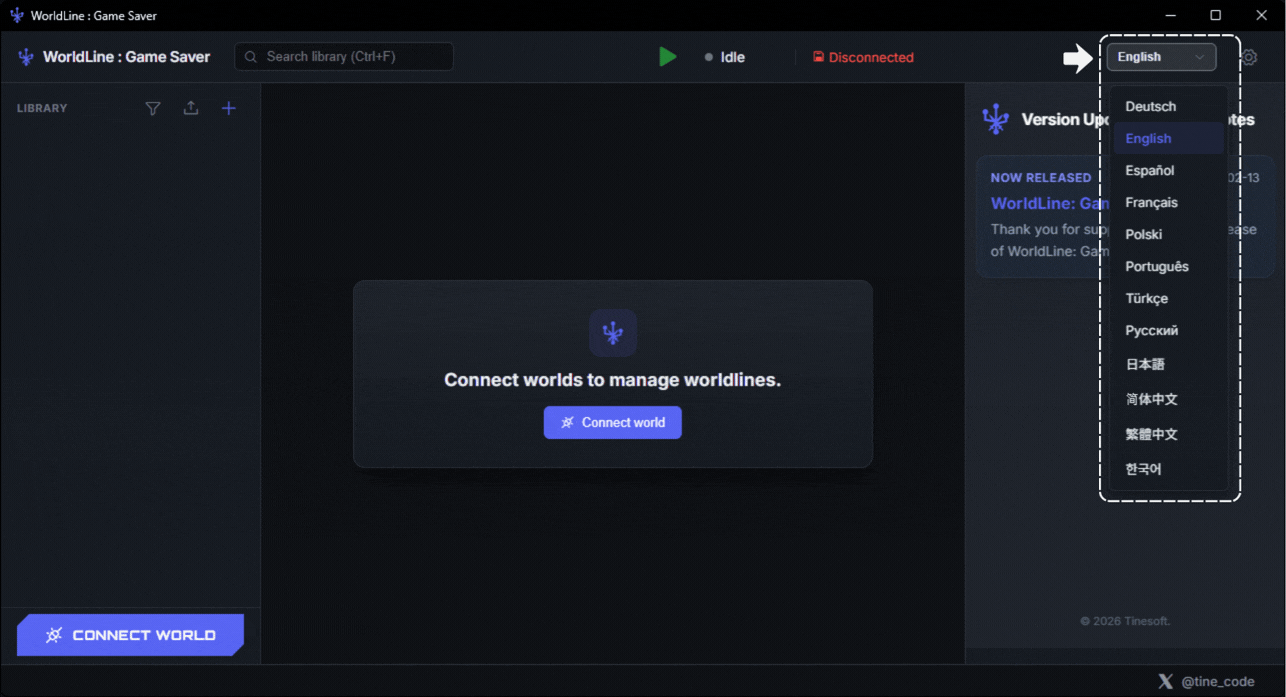
1. Click the button at the top of the main window to quickly change the program language!
2. If your preferred language is not listed yet, contact us anytime at tinesoft.service@hotmail.com.
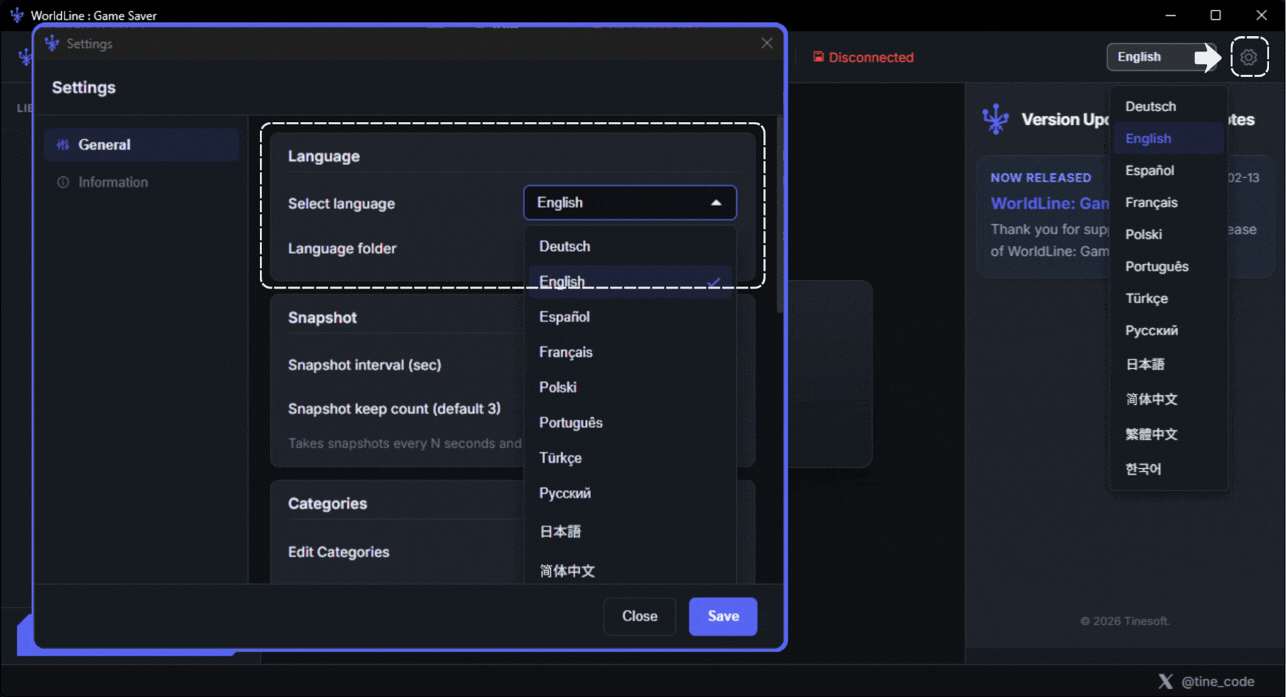
1. You can also change the program language in the settings window.
Change User Theme
Switch the app theme to your preferred style.
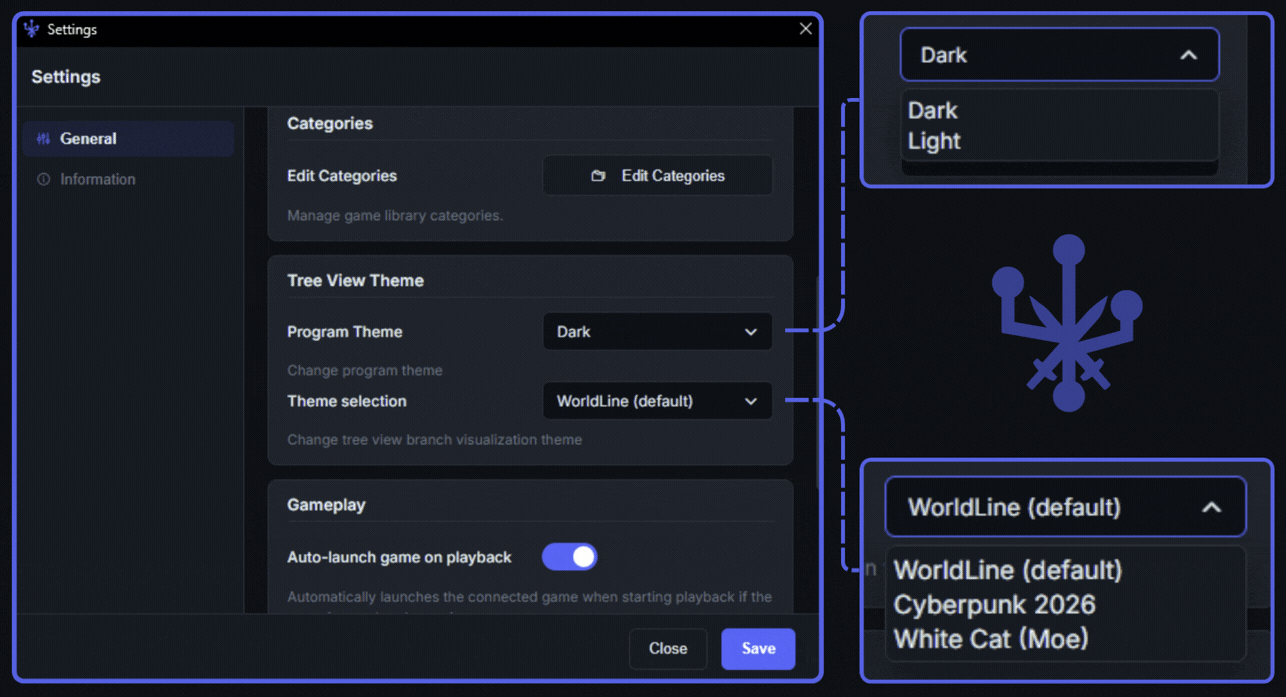
1. You can change the overall program theme and the worldline viewer theme.
1. This is WordLine with the Light theme and White Cat (Moe) theme applied!
2. If you have a theme idea to add, contact us at tinesoft.service@hotmail.com!
Snapshot Setup
Configure snapshot interval and retention count.
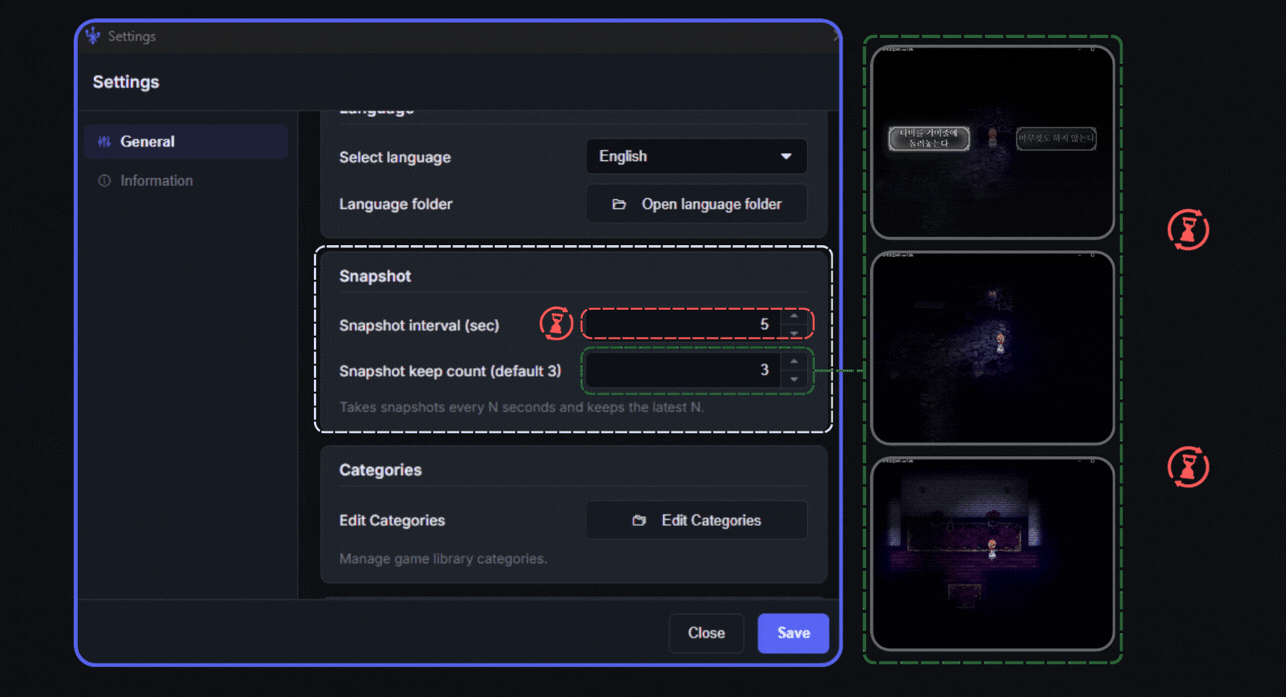
1. Set the timer interval for taking snapshots in スナップショット撮影間隔(秒).
In this example, a snapshot is saved every 5 sec.
Do not worry about storage. It only uses space up to the user-defined 保持数(既定 3) size.
2. 保持数(既定 3) means how many snapshots to remember.
In this example, snapshots are taken every 5 seconds and 3 snapshots are retained. It keeps 15 sec of snapshots from the save point.
Set how many snapshots to keep.
Edit Categories
Add or update categories used by events.

1. You can edit categories on the Connect World page or in the Settings window.

1. Enter a category name and click the + button to register it.
2. You can check how many libraries are currently assigned to each category.
3. SampleName was successfully added to the category!
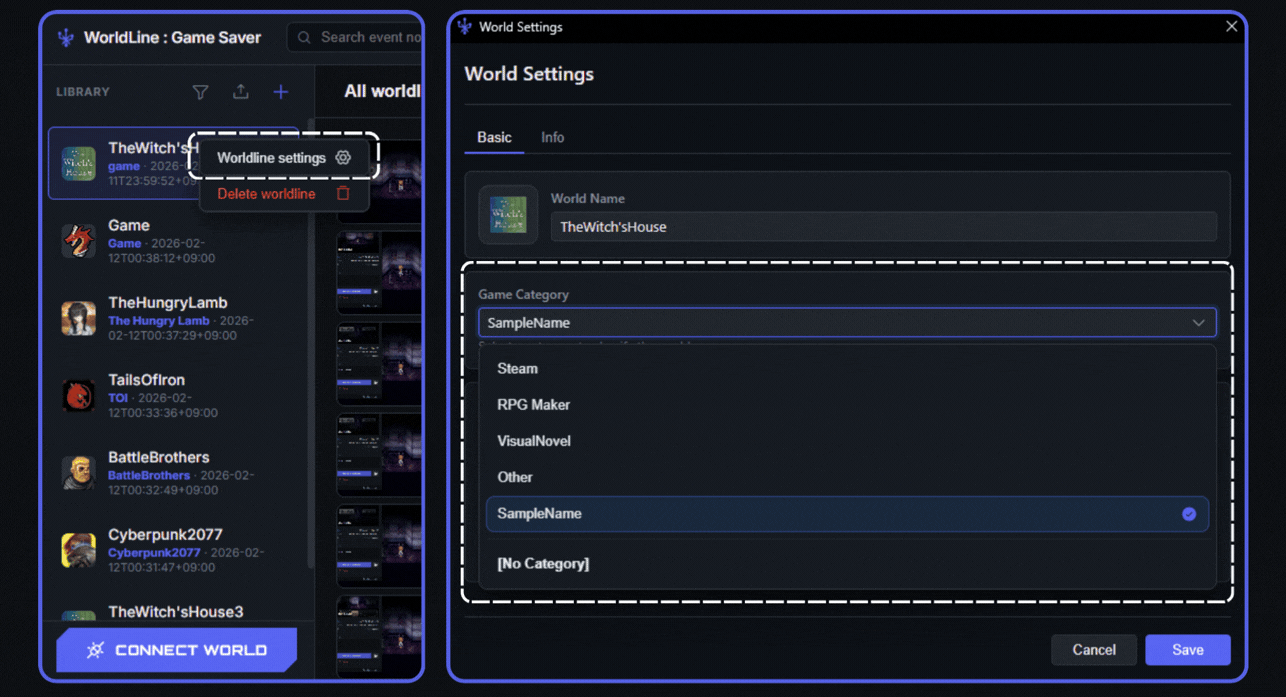
1. Right-click a Library, click Worldline Settings, and edit Game Category.
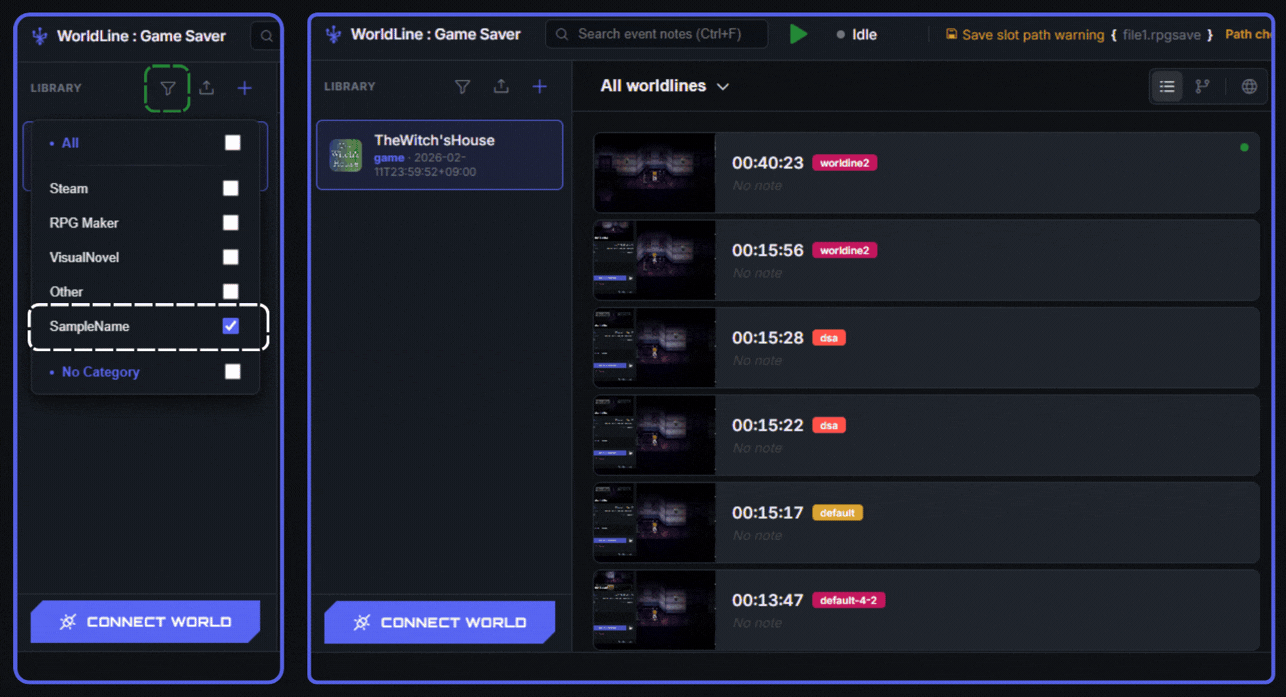
1. Click the Filter button to choose which Category of libraries will be shown.
Export All Saves
Export every save entry to a file.
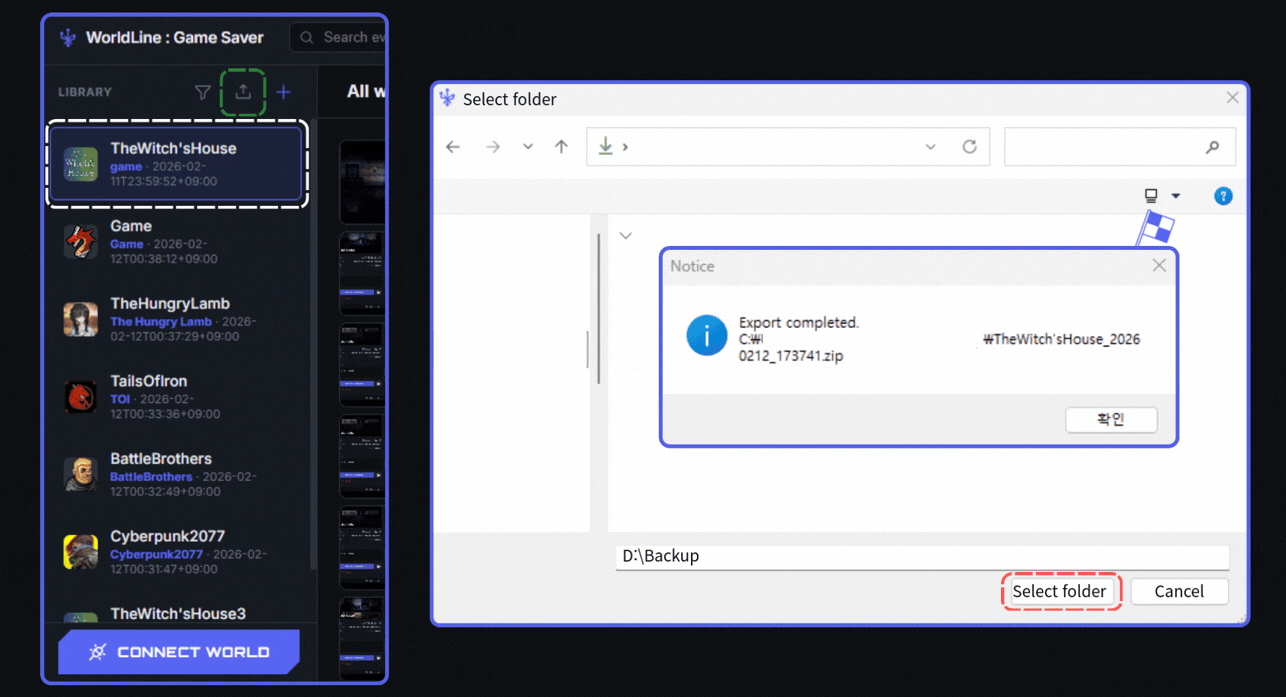
1. Select the Library you want to back up all save files from.
2. Click the Export icon button.
3. Choose a folder to save all exported save files.
Check the selected folder. You can find the compressed full save backup there!
Verify generated export file.
Import All Saves
Import previously exported save files.
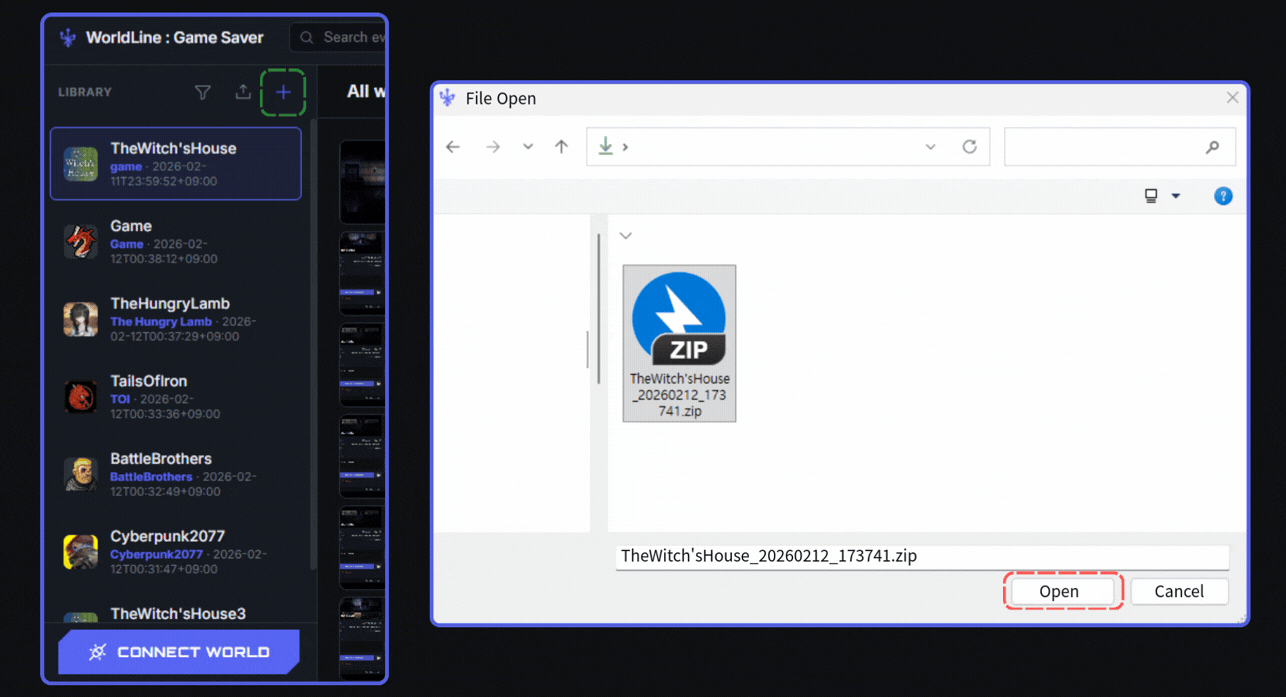
1. Click the Import icon button.
2. Load the compressed save archive file.
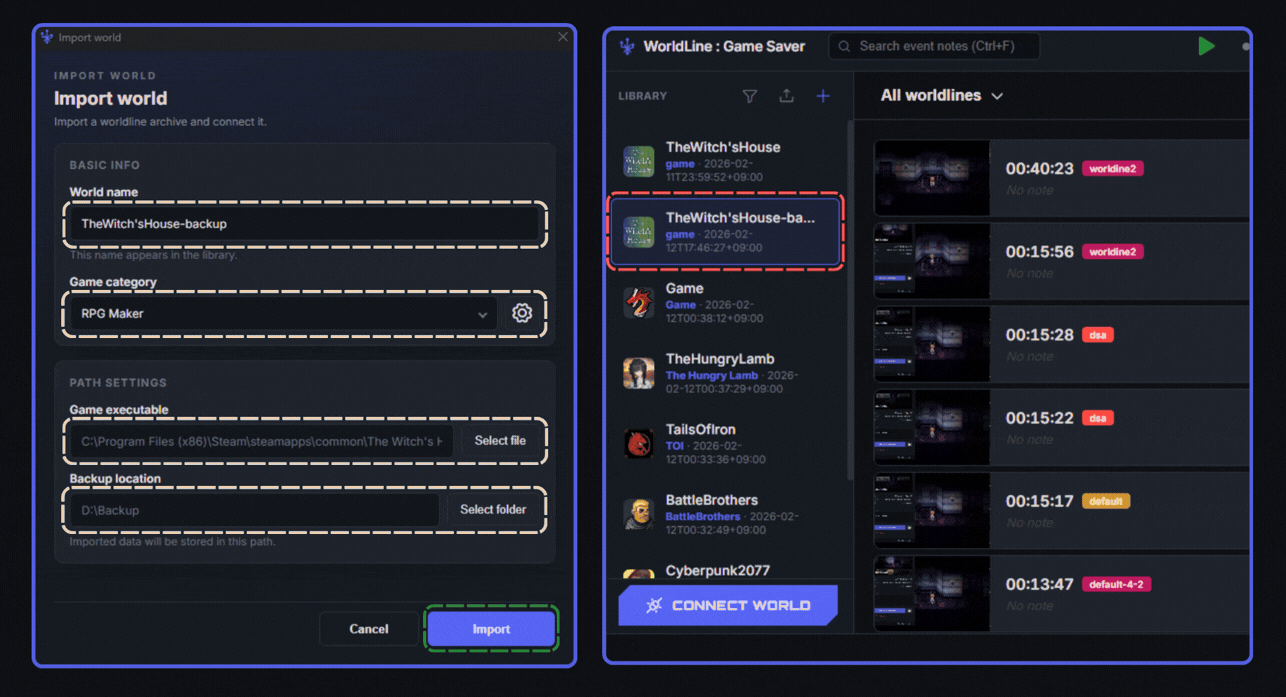
1. Set the library name and category to manage imported save files.
2. Set the game executable location and save file path to match your environment.
3. A new imported library has been added to the user's library!
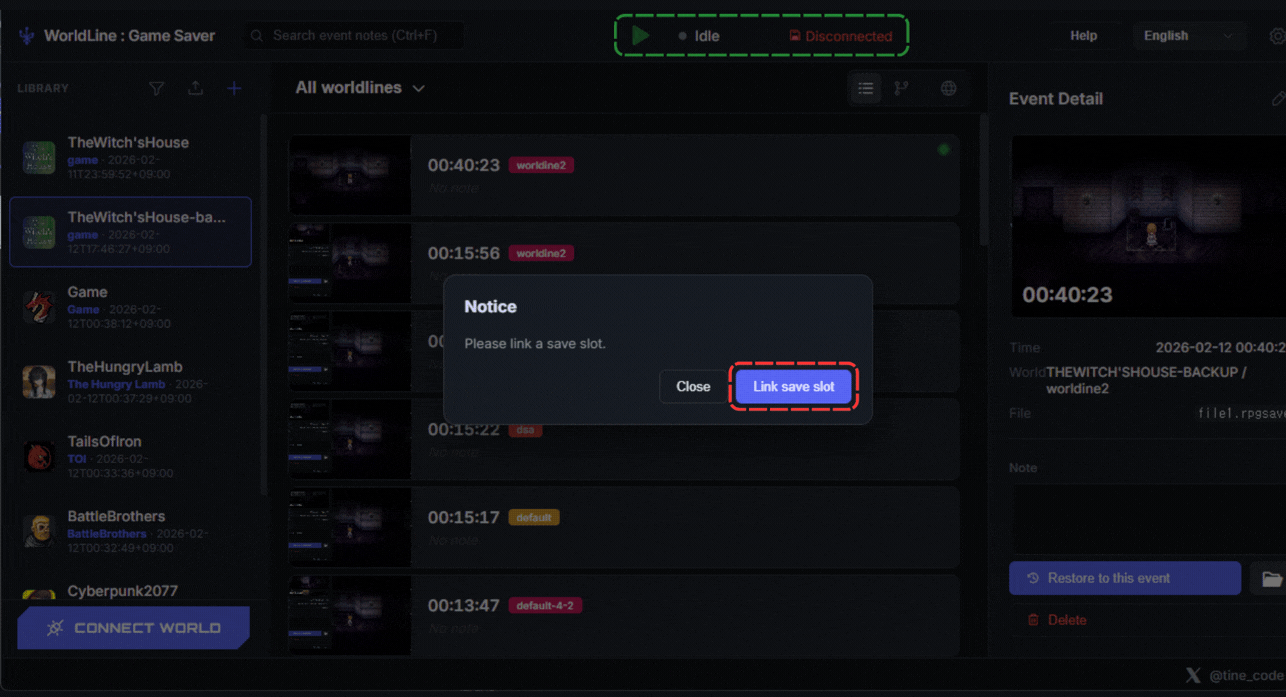
1. Press Play and you will see a notification like this.
2. Press the セーブスロットを接続 button!
1. Connect the real user's game save file.
2. Press Save to complete all steps.
Using Search Tools
Use search and filters to quickly find the data you need.
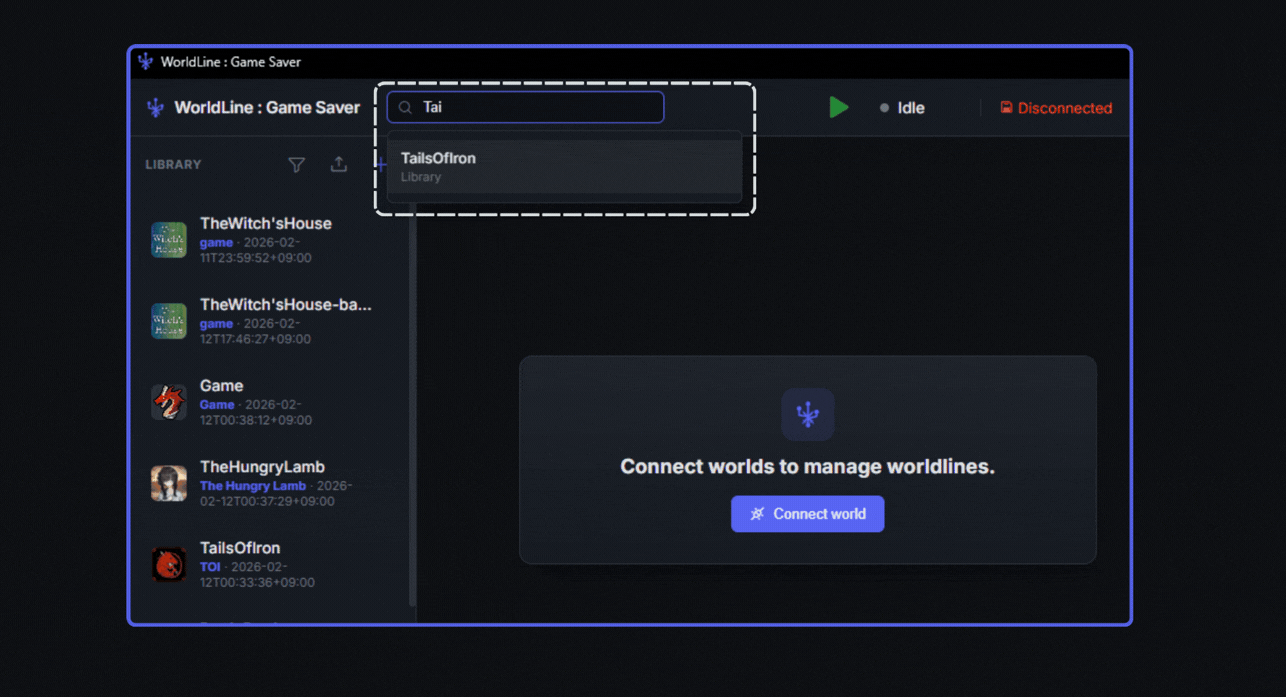
You can easily search libraries using the Search Box when no Library is selected.
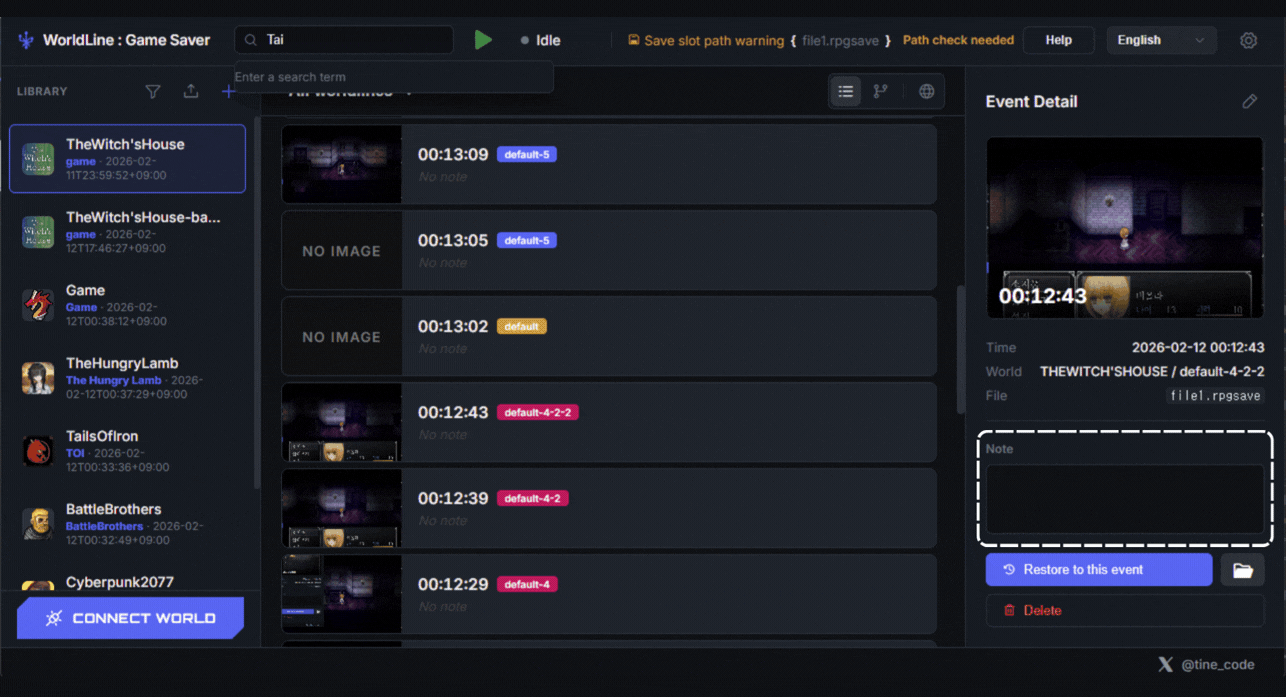
1. Select the Library that contains the event you want to search.
2. Enter a memo in Note to remember the event.
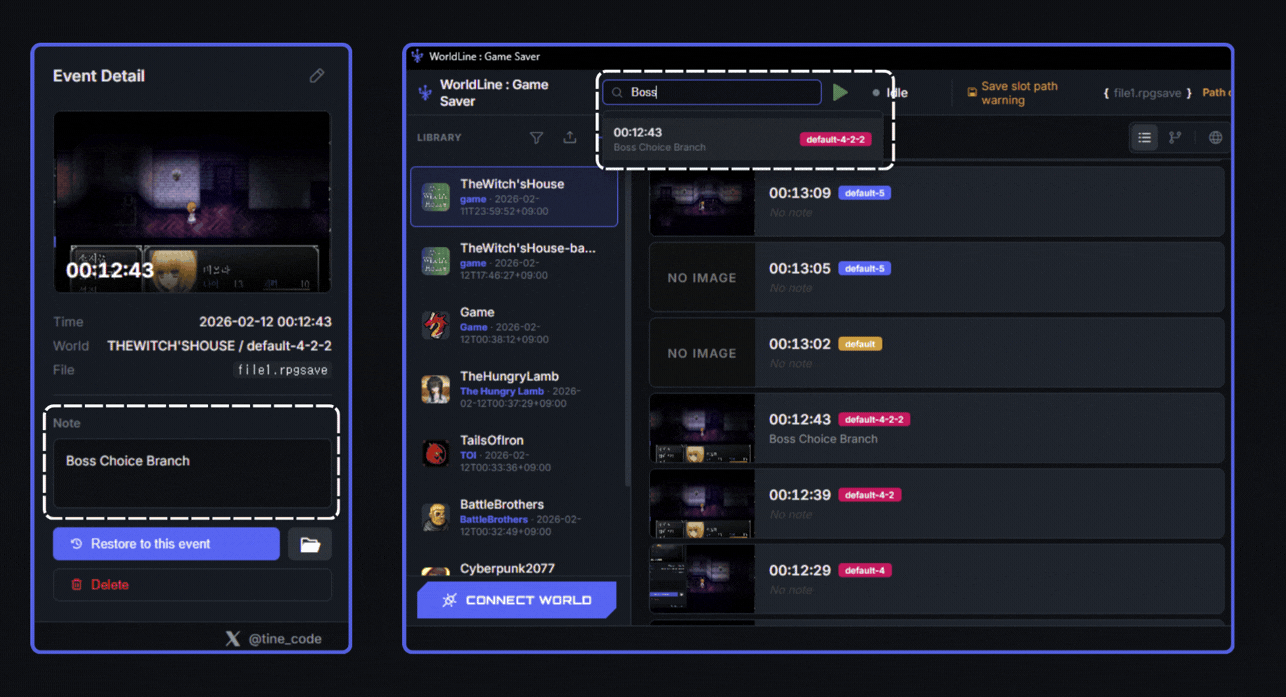
1. Select a Library and search the keyword entered in Note to quickly find events.
インストール、アプリガイド、FAQ、リリースノートは WorldLine 専用ページから確認してください。